Nursery themed explosion box card for a new baby girl
There have been several new babies born into my family over the past 12 months and a friend of mine gave birth on the 1st of January 2020! So to celebrate I show you here how I made an explosion box card. I’d previously made a similar one for my great-nephew in baby blue and white. It was definitely a hit!

Step 1
To create the box I scored the pink 12″ x 12″ card at 4″ and 8″, turned and repeated on the other side with an additional scoreline of 9″ to create a tab to keep the box closed on 2 sides.
 Step 2
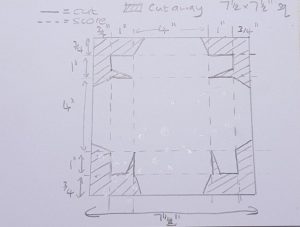
To create the lid for the box I started with a square of the pink pearlised card 7.5″ x 7.5″ and scored at 0.75″ and 1.75″, turning the card through 90 degrees and repeating the score lines. Cut as per the image to create tabs to assemble.
 Step 3
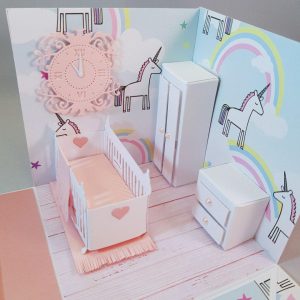
Once the lid and box are assembled I created a wardrobe, drawers and cot from white card stock and used flat backed pearls as handles. I adhered these items to the inside of the box.
Step 4
I created a rug using a square of pink card and snipped at the ends to create fringing.
Step 5
I lined the inside of the box with unicorn paper to create wallpaper and a wood effect patterned paper to create a wooden floor. Using a die cutter I also made a clock which I set to the time the baby was born.
Step 6
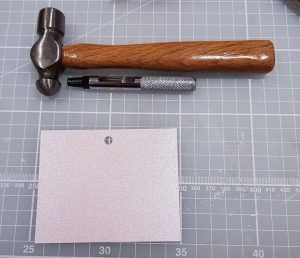
Many different embellishments could be used at this point to record the name of the baby, the date of birth, time of birth and even the baby’s weight. I simply used a January 2020 calendar and added a pink heart onto the day that the baby was born. I also printed out the baby’s name and weight and added them onto the side with the calendar (not shown on the images).

Step 7
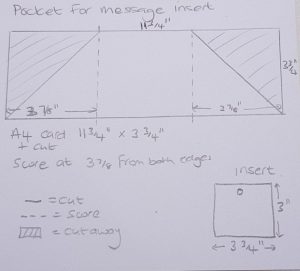
Next, I created a pocket that could hold a message insert – see diagram.
Step 8
Finally, I created a shaker element with sequins a little smaller than the lid and affixed to the lid. I adhered the ‘Welcome Little One’ die-cut to the acetate.
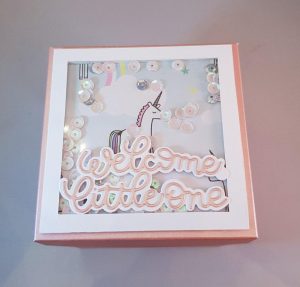
And that’s it. Simple to do once you get the hang of it, but it is quite a time consuming, but so worth it when complete.
I hope you’ll give it a try – don’t forget to share your version on Instagram, using the hashtag #papermilldirect.
0
Discussion